HOME SOLAR PROJECT
Problem Statement:
Monitoring the AC Load connected to the Home Solar Kit
Installation of IoTaWatt:
Monitoring the AC Load lead to installation of IoTaWatt.
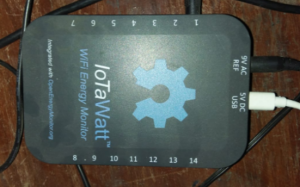
Iota-Watt is a open software and open hardware IOT Device. It is mainly used to log AC Power, Voltage, Current and Energy (Kilowatt-hours) of electrical appliances.
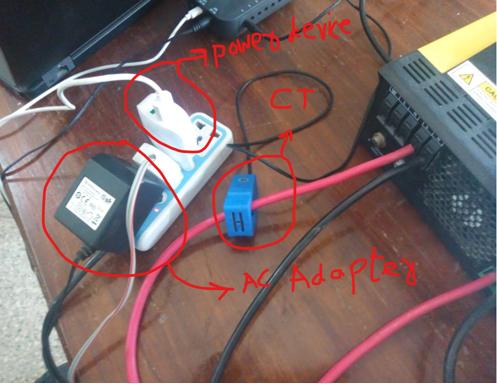
It has to be powered with a 5V DC and it takes 9V AC as a reference from AC Adapter of 230/9V AC. The later voltage is used to sense the AC Voltage and log it. CTs are used to sense the current. The inputs for Current sensors (CTs) are numbered from 1-14 as shown in the figure. The Home Solar team has used AC Adapter Model No. DE-06-09 by Ideal Power Ltd and CT Model No. SCT-013-000.
Following steps were taken:
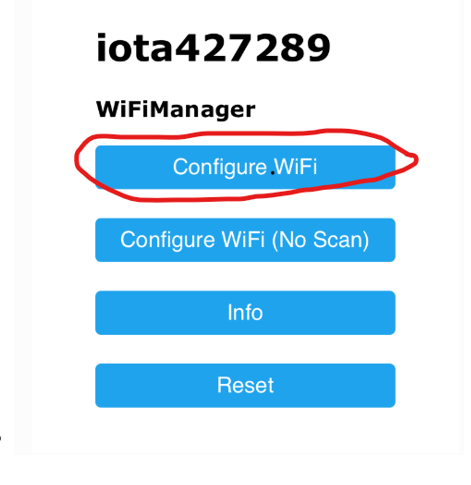
Step#01: IoTawatt when powered, gives 1 time Red and 2 times Green blinks (RED-GREEN-GREEN). It indicates that it is not connected to any of the Wi-Fi Module. Hence, by scanning Wi-Fi networks on PC, it gives a network name e-g iota45726849. Connect to the IotaWatt by providing a general password “IotaWatt”. A window will pop up in the default web browser as shown in the figure. Now, click on the ‘Configure WiFi’.
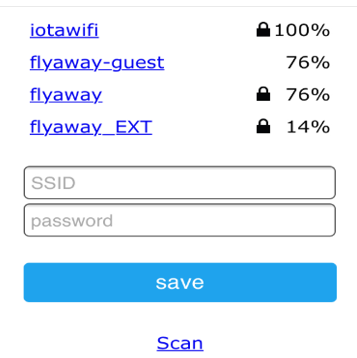
Step#02: Select your network and enter the password, then save. IoTaWatt will restart, to make connection with the WiFi and get disconnected from your PC. If it is connected to the desired WiFi then its LED will continuouly blink,very fast, intermittently (LED glows dull green).
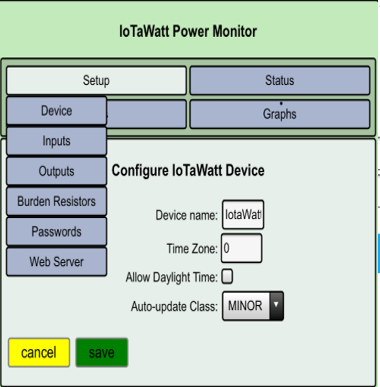
Step#03: Go to the http://iotawatt.local or http://192.168.4.1 if the prior is not working. First of all, set up the device. Click on “Setup” icon and the “Device” from the drop down menu. Name the device, change the time zone to 5 (for Karachi it is GMT +5). Check the “Allow daylight Time”, Auto-Update Class to “Minor”, and click “save”.
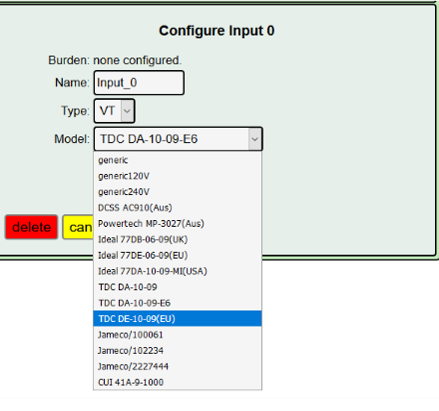
Step#04: Now, to configure “Voltage” input i-e AC Adapter for reference, click on the “setup” icon, select “inputs” then name the input as desired. Select the type “VT”, Model “Ideal 77DE 06-09” and click “save”.
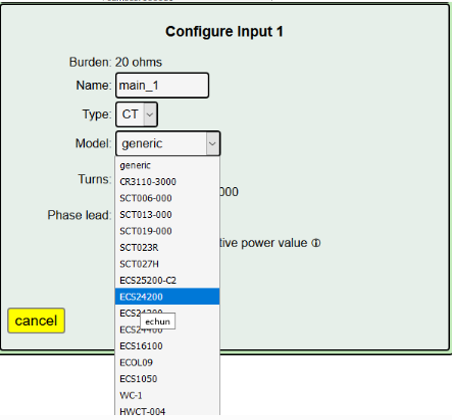
Step#05: Now, to configure “Current” input i-e CT SCT-013-000, click on the “setup” icon, select “inputs” then name the input as desired. We have named it as “incomer1”. Select the Type “CT”, Model “SCT013-000” and click “save”.
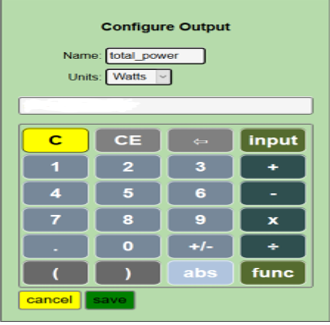
Step#06: For configuring outputs, click on the “setup” and then “outputs”. Click on the “input” icon as shown in the figure, and then select the “incomer1”. The power will be calculated automatically without multiplying it with the voltage. Just select the “incomer1” i-e current and click “save”.
Step#07: To set up remote connection to log the data, an open source server “Emoncms.org” is used. Create ID and get “API Key” and “Emoncms userid”.
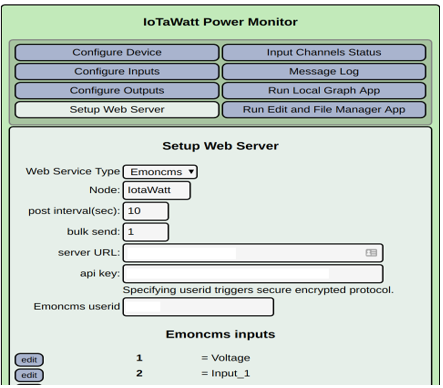
Go to the http://iotawatt.local or http://192.168.4.1 if the prior is not working. Click on “Setup Web Server”, select “Emoncms”, Node Name “Home Solar Kit”, URL (Automatically set to default, donot change it), put “API Key” and “userid”. One may edit the inputs as required.
Then Click “save”.
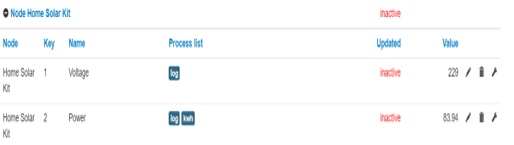
Step#08: Log in to the server. Click on the “setting” icon and select the “Inputs”. Now, in front of the inputs shown, click on the “ “icon. Name and select the inputs to be logged as shown in the figure.
Set Up Image:
Results:
Here, are the results.
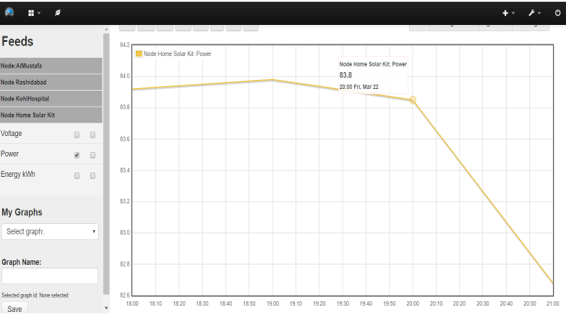
At night 84.8W load hooked for 16 hours while 224.8 W load for 7 hours. Hence, the home Solar Kit can supported a load of 1356 Watt-Hours, efficiently, through a back up at night and a load of 1573.6 Watt-Hours, during the day.
Next steps to be taken:
- Calculations for power losses of the whole system.
- How to optimize system’s efficiency? What are the recommendations?


