OBJECTIVE:
Sawayra Orphanage Project team decided to hold the hands of members of Al-Mustafa Academy to meet their basic need of electricity. The motive of Sawayra Orphanage Project team is to install PV Solar System in Al-Mustafa Academy Orphanage center (located at 24.8170510880231, 67.13031758339595) to provide electricity to run electrical appliances to fulfill the very basic needs of the residents. Mentioning step by step procedure of installation of a PV system is a useful guide for those who are willing to generate power by a renewable energy.
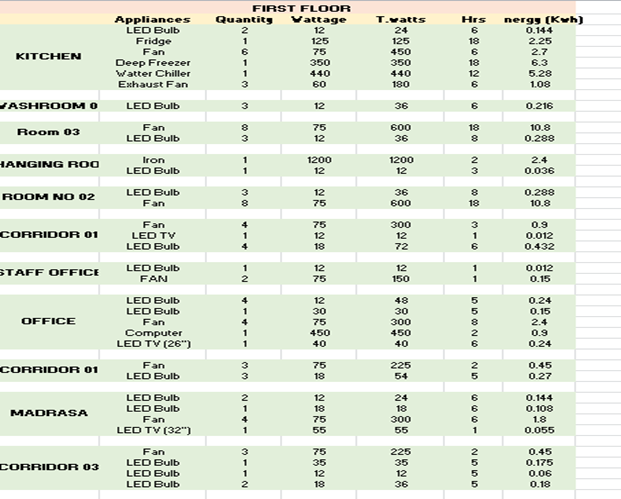
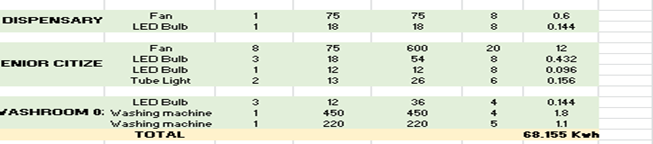
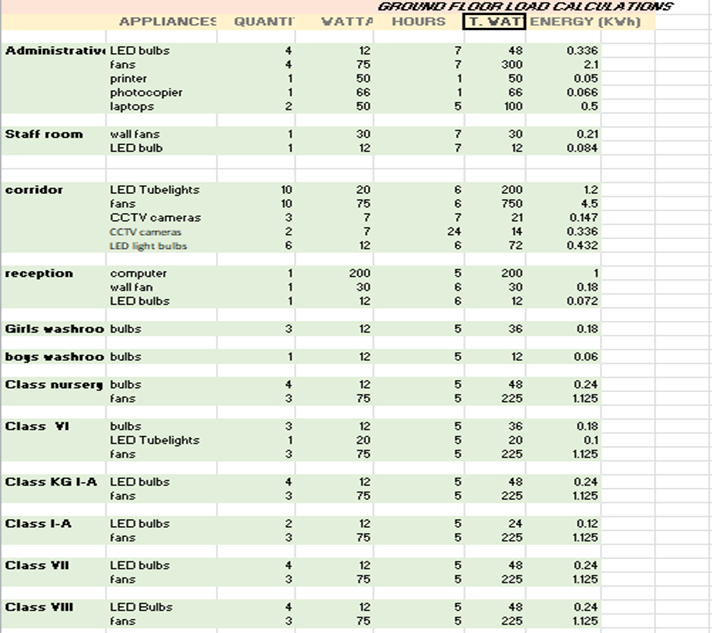
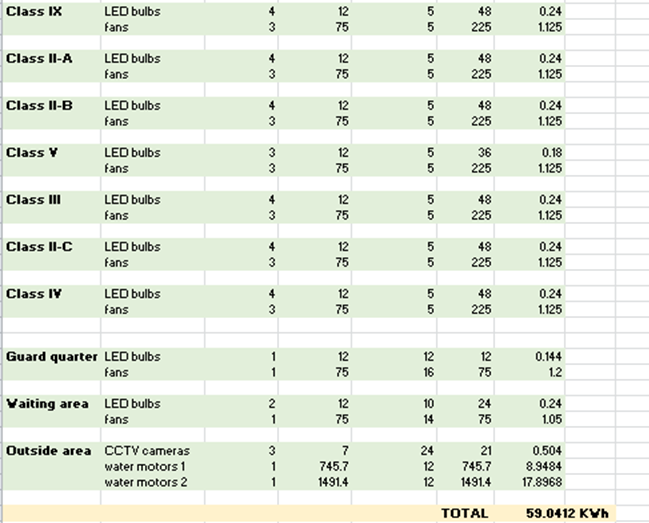
Step: 1 Calculate Load Consumption:
Before installing your system you have to calculate the amount of power required to run the appliances. For this purpose at first we required bills of Al Mustafa academy. From bills we found how much units of power were consumed. It was about 10kW. Secondly we checked how many hours of load shedding and power interruptions there. According to which we ensured the required voltage of our battery reservoirs. Calculation of load consumption of each appliances of Al Mustafa Academy is below:
Step: 2 Components of a PV System with their Cost:
Second step is to make a checklist of equipments needed for a solar energy system. Our checklist includes:
- 38 Canadian solar panels each of 325 watts. (https://www.canadiansolar.com/)
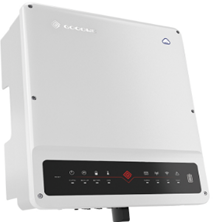
- Hybrid inverter of Alpha ESS Company.
- 2 mppt Charge controllers built within the Inverter.
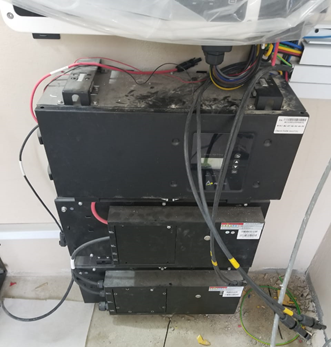
- Battery management system (BMS).
- 6 batteries of Alpha ESS company each of 52V.
- Connection wires of area 10mm2 .
- Smart meter.
- Distribution box.
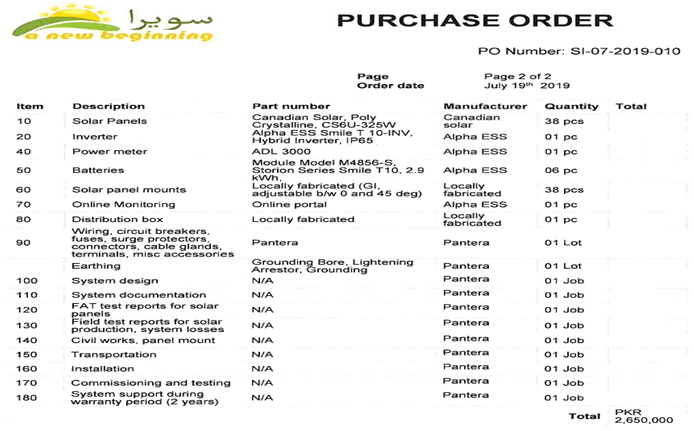
The overall cost for all these electrical components was around 30 lacs (year 2020) along with the amount paid to workers for system installation as well as to labors for padding.
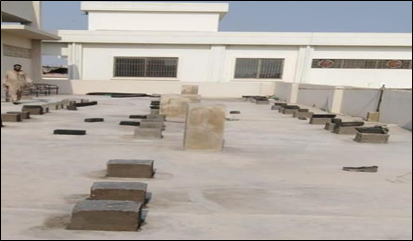
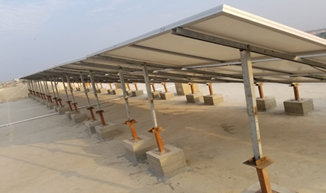
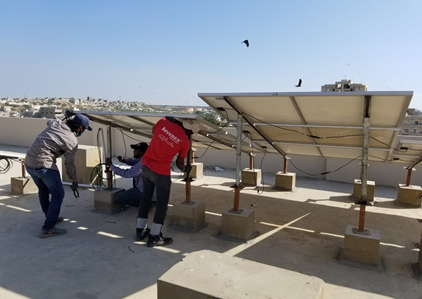
Step-3: Mount Installation:
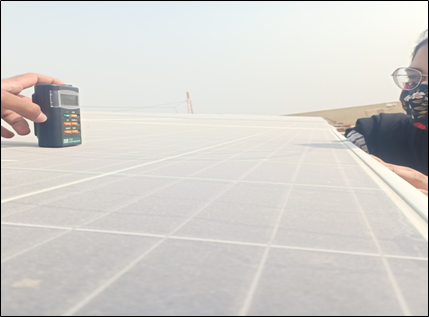
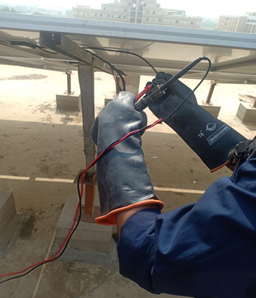
Before Installation, make sure of any obstructions to sunlight. Remove all unnecessary obstructions and items such as branches that may block sunlight to your solar unit. You should also trace the path of the sun in the sky and make sure there is no object that may cast a shadow over panels. Shadow can affect the operating efficiency of solar energy unit.
For this purpose cements blocks of 1 x 1 x 1 dimension are installed to avoid shade encroachment and for proper ventilation of panels Radiance is also calculated by radiance meter. Metallic structures are also placed at the legs of solar panels to get a proper angle where we can get radiance upto 800 W/m2 and to provide strong support to panels.
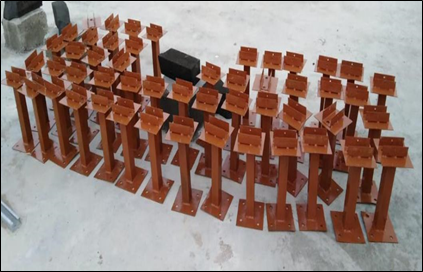
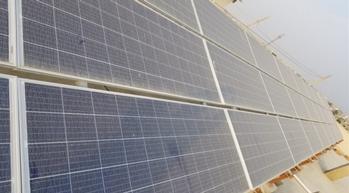
Step-4: Install the Solar Panels:
Next step is to fix the solar panels with the mounting structure. This is done by tightening nuts and bolts. Care is taken to secure the whole structure properly so that it is sturdy and lasts long.
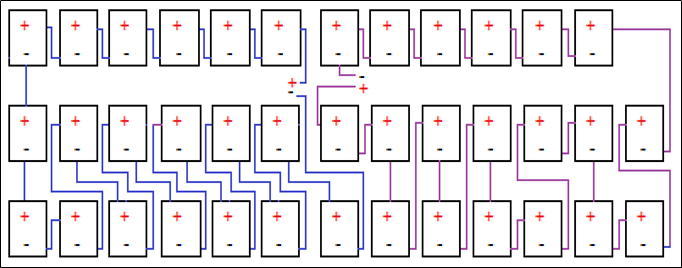
Step-5: Connection of Panels:
Next step is to do the electrical wiring. Universal Connectors like MC4 are used during wiring because these connectors can be connected with all types of solar panels. Panels can be electrically connected with each other in following arrangement:
1. Series Connection: In this case, the Positive (+) Wire is of one PV module is connected to the Negative (–) Wire of another module. This type of wiring increases the voltage match with the battery bank.
2. Parallel Connection: In this case, Positive (+) to Positive (+) and Negative (–) to Negative (–) connection is done. This type of wiring voltage of each panel remains same.
To get optimum power of 10kW we connected 19 panels in series and other remaining 18 panels in series then these 2 sets of series combination are further connected in parallel combination as shown in the Schematic diagram of connections of panels:
Step-6: Connect the System to Solar Inverter:
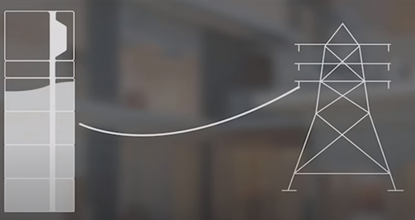
The sun shines on the solar panels generating DC electricity. The DC electricity is fed into a solar inverter that converts it to 220V 50 Hz AC electricity. The 220V AC electricity is used to power electrical appliances. Surplus electricity is fed back into the main grid. Now further step is to connect the system to a solar inverter. The Positive wire from the solar panel is connected to the Positive terminal of the inverter and the Negative wire is connected to the Negative terminal of the inverter. The solar hybrid inverter is then connected to the Solar Battery and Grid input to produce electricity.
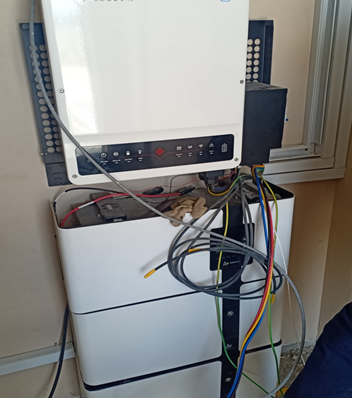
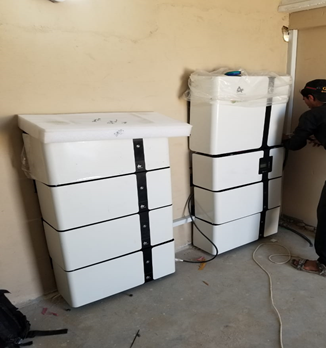
Step-7: Connect Solar Inverter to Batteries and grid:
Next step is to connect the solar inverter with the solar batteries and grid. Inverter is connected to battery controller ( master controller) which shows battery status and maintains battery performance. The positive terminal of the battery controller is connected with the positive terminal of the inverter and negative to negative. Batteries are needed in off grid solar system to store electricity as backup. Our system is hybrid (on grid and off grid) therefore our inverter is supplied with a grid as well as a backup system of batteries is also available as a reservoir to store electrical power in off grid situation. After this, inverter is connected to the grid. To make this connection, a normal plug is connected to the main power switch board. An output wire is also connected with electric board that supplies electricity to the home.
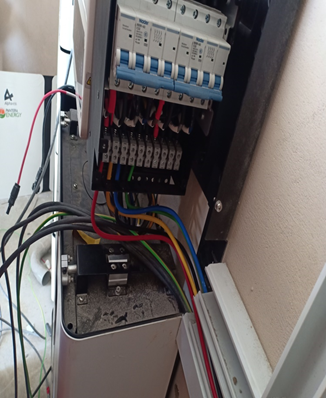
Step-8: Electrical Wiring:
In order to supply power on different floors a distribution box is needed that divides an electrical power feed into subsidiary circuits of each floor, while providing a protective circuit breaker for each circuit in a common enclosure. We connect wires from distribution box to the switch boards of each room to supply power to electrical appliances in the room.
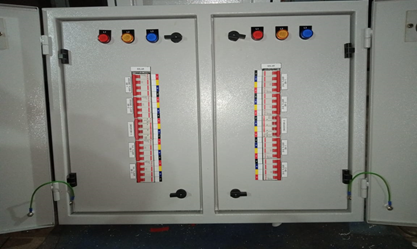
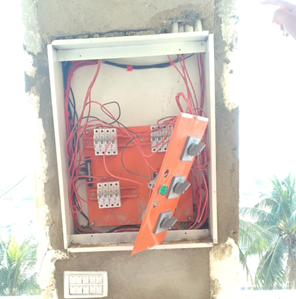
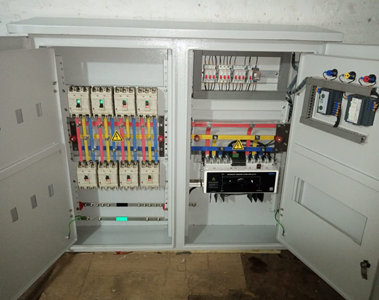
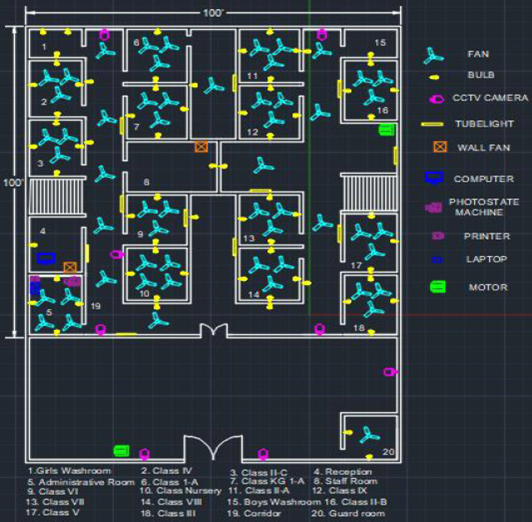
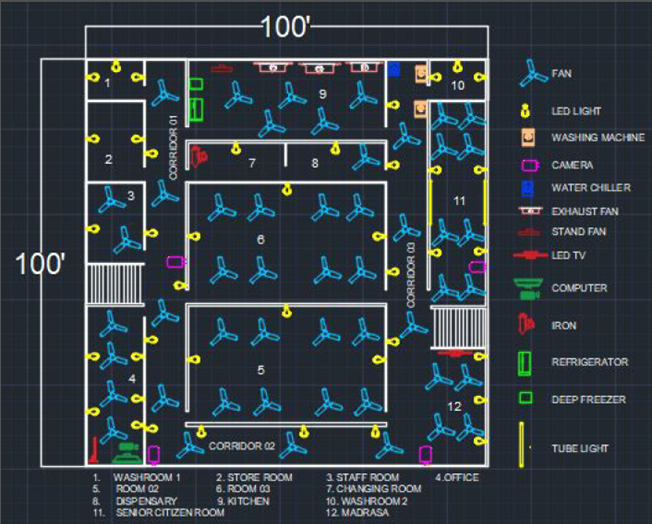
Now further we connect main distribution box to distribution boxes of each floors and then we make connections from distribution boxes of each floor to the electrical appliances of the respective floor. Here’s electrical layout diagrams of ground floor and first floor which show the mapping of load in both the floors that how many load appliances are connected to distribution box.
Electrical layouts of ground floor:
Electrical layout of first floor:
Step: 9 Start Solar hybrid Inverter:
Now when all the electrical wiring and connections are done, it is time to start the inverter in a following sequence:
- Turn ON the breakers of Battery Management System.
- Switch on AC grid. The electrical connections on the DC side and the AC side are represented with a color LED screen display.
- Now power on solar inverter.
- Turn ON DC input. A flashing dashed line on DC side indicates the PV panel is feeding power to the inverter.
Once the system is started, Battery Management System displays the battery status and power production. The energy storage system is used to capture electricity produced by renewable resources to store it and use it when required. The system allows users to go off-grid or switch to stored electricity at a time most beneficial, giving greater flexibility and control of your energy consumption.

UPS mode shows that backup power is being provided to the building in loadshedding or off-grid state.
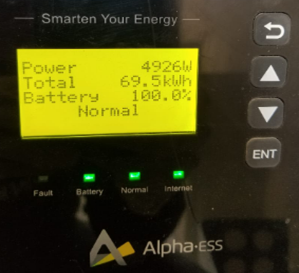
Normal mode shows that batteries are charging and KE is available.
SOLAR POWER GENERATION SYSTEM INSTALLATION AND MAINTAINANCE:
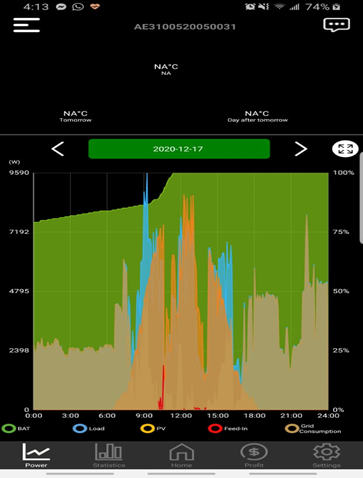
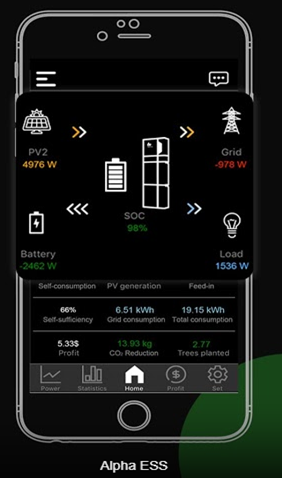
Sawayra organization and its team recently completed a PV installation for AL-Mustafa orphanage center, a 3 phase hybrid 10kWH Inverter, 38 x 325W solar panels and 6 Lithium 2.9kVA Batteries, providing a total of 17.4kVA back-up. Solar inverters of Alpha ESS have digital display to show you stats regarding generation and usage of solar unit. The AlphaESS provides a convenient way to monitor your AlphaESS system from anywhere, anytime. Using AlphaESS’s internet enabled Energy Management System you can see the performance of your PV system, the amount of energy produced by your solar panels, load consumption of your system and where the load is drawing from, all these are displayed in a user-friendly graph. The power output of a solar PV system depends on its efficiency, size and location. The graph shows average production of 1 month which is about 5kW. It is not that much high due to winter season, there is less load appliances are connected as fans and Air Conditioners are off. Therefore the required power production is low as a result we get 5kW power generated from panels. The system provides backup for at least 4 hours or more after applying critical load situation ( when all load appliances are connected). The system provides massive value and self-sufficiency in getting off the grid with a quality solution backed by a company with a solid and proven track record and unmatched expertise.
Maintaining Your Solar Power System:
Maintenance is required for the efficient operation of your solar system. You can maintain your system in a following manner:
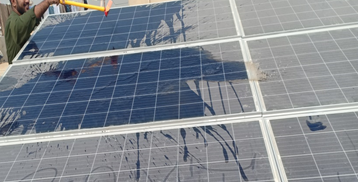
- Solar modules (Check every 3 months):
The solar modules will usually stay clean from rain. During extended dry or dusty conditions, it may be necessary to hose the modules with water from the ground. They may also be cleaned with warm soapy water and a sponge. The panels should be kept clean of dust, leaves, and bird/bat droppings as this will have an effect on the efficiency of the solar system and could be a substantial financial loss over the lifespan of the solar system.
- Inverter (Check every week)
Regularly check the inverter is operating by monitoring the display. Ensure the inverter is kept free of dirt and leaves to prevent heat build up.
- Frames (Check every 12 months)
Check the frames are secure and there is no sign of rust or corrosion.
- Cabling (Check every 12 months)
Check all cables, conduits and fixings are mechanically secure.
- Switches (Check every 6 months)
Check the switches operate correctly by switching them off then on (Always switch off solar supply main switch first). Ensure they are mechanically secure. System maintenance can increase the efficiency of the solar system, the performance of a PV system and could be a substantial financial loss over the lifespan of the solar system.


